本編主軸將會是利用Python Django Web設定webhook,讓Line可以連動.
不過T編預設讀者已經有基礎知識,就不特別多講細節.
0.開始之前記得要先下載Line Bot SDK,透過SDK可以減少處理的時間,具體參考
pip install line-bot-sdk1.建立Django專案
2.建立一個app接收webhook之用
3.定義專案路由
from django.contrib import admin
from django.urls import path, include

urlpatterns = [
    path('admin/', admin.site.urls),
    path('bot/', include('bot.urls')),
]
4.定義bot的view用來接收line webhook,要注意的就是Line Channel Access Token與Line Channel Secret,要從上一篇取用[當Line Bot 遇上 OCR – Line機器人設定篇]
from django.http import HttpResponse, HttpResponseBadRequest, HttpResponseForbidden
from django.views.decorators.csrf import csrf_exempt

#這段就是將LineSDK引入
from linebot import LineBotApi, WebhookParser
from linebot.exceptions import InvalidSignatureError, LineBotApiError
from linebot.models import MessageEvent, TextSendMessage

line_bot_api = LineBotApi('Line Channel Access Token') #這邊就是接續上一篇,我們在設定的Line Bot的兩個參數,請設定過來
parser = WebhookParser('Line Channel Secret') #這邊就是接續上一篇,我們在設定的Line Bot的兩個參數,請設定過來

#定義暫存圖檔路徑
import tempfile, os
static_tmp_path = os.path.join(os.path.dirname(__file__), 'imgtmp',)

#主要程式
csrf_exempt
def callback(request):
	print('BOT Start...')#先設定一個印出,用來Debug,一開始測試確保callback有被呼叫
	if request.method == 'POST':
		signature = request.META['HTTP_X_LINE_SIGNATURE']
		body = request.body.decode('utf-8')

		try:
			events = parser.parse(body, signature)
		except InvalidSignatureError:
			return HttpResponseForbidden()
		except LineBotApiError:
			return HttpResponseBadRequest()
		for event in events:
			if isinstance(event, MessageEvent):
                                #line事件有多種,具體請參考line sdk,這邊是判斷使用者上傳為圖片.
				if event.message.type == 'image':
					print('圖片')
					ext = 'jpg'
					#儲存檔案處理
                                        #此段依據需求自訂,主要是透過line接收圖檔並且存入,具體可以參考line sdk
					message_content = line_bot_api.get_message_content(event.message.id)
					with tempfile.NamedTemporaryFile(dir=static_tmp_path, prefix=ext + '-', delete=False) as tf:
						for chunk in message_content.iter_content():
							tf.write(chunk)
						tempfile_path = tf.name
					dist_path = tempfile_path + '.' + ext
					os.rename(tempfile_path, dist_path)
					#處理辨識
                                        #這邊就是呼叫韜睿的發票/交通票辨識OCR
					OCRURL = 'API URL' #屆時拿到的API
					ocr_result = ocr_cpu(dist_path,OCRURL) #呼叫API進行辨識處理
					json_ocr_result = json.loads(ocr_result)
                                        #取得JSON並且處理格式
					text_result = '日期: ' + str(json_ocr_result['Result']['Date']) + '\n' + '發票號碼: ' + str(json_ocr_result['Result']['ReceiptNum']) + '\n' + '賣方統編: ' +  str(json_ocr_result['Result']['SellerNum']) + '\n' + '買方統編: ' +  str(json_ocr_result['Result']['BuyerNum']) + '\n' + '金額: ' + str(json_ocr_result['Result']['Charge'])
					line_bot_api.reply_message(  #回復傳入的訊息文字
							event.reply_token,
							TextSendMessage(text=text_result)
					)

				else:
					text_result = '歡迎至官網了解我們的解決方案\n https://www.ignsw.com'
					line_bot_api.reply_message(  # 回復傳入的訊息文字
						event.reply_token,
						TextSendMessage(text=text_result)
					)

		return HttpResponse()
	else:
		return HttpResponseBadRequest()
5.定義bot的url,這就是呼應view定義的callback
from django.urls import path
from . import views

urlpatterns = [
	path('callback', views.callback)
]
6.基本上設定就完成,中間內容隨自己喜好可以增加減少,接著就上傳服務器,記得Web一定要用https
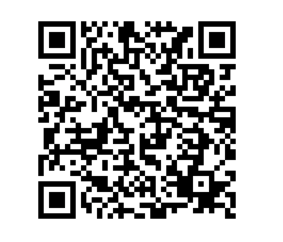
7.是不是很簡單就可以完成一個具備’眼睛’的Line機器人,成品如下,歡迎測試使用.
發票辨識機器人
由於更新新版機器人,請由此加入


![]()
